Aspen Knolls Estates H.O.A., Inc.
Home Maintenace Tips
Home Maintenace Tips


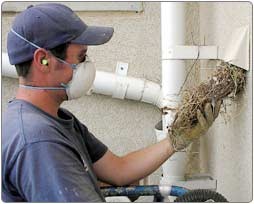 Guidelines: Dryer venting tips and practices
 The importance of proper dryer venting can scarcely be overstated.
Good Practices:
Look for birds nest or clogged openings. Most importantly, feel for proper exit velocity of the air leaving the vent and look at or feel the interior walls of the duct.
If you suspect clogged or partially clogged exhaust ducting, it is likely you need to have them cleaned. Dryer vent cleaning improves the safety and efficiency and depending on the venting circumstances, should be cleaned or inspected every 6-12 months.
Make sure your flex transition hose is not kinked or crushed. The space behind your dryer should be sufficient as to provide adequate room for the flex transition hose to make its bends with minimal deflection and restrictions.
Dryer Vent Maintenance:
The United States Consumer Product and Safety Commission recommends routine maintenance of dryer vents and dryer duct-work to help prevent dryer fires. Routine maintenance not only helps prevent fires but also aids the dryers' energy efficiency. Dryer vent maintenance can be performed by the average homeowner within a few hours. Maintaining the vents and duct-work now prevents major problems later. Does this Spark an idea?
Dryer Vent:
Disconnect the dryer duct-work from the outside vent. It is usually held on by a clamp with an adjustable screw. Loosen the clamp and slide the duct-work off the main vent. Go outside and remove any lint and debris from the vent. Inspect the overhead vent cover for damage and make sure it is secure against the home.
If bird nests are found inside the vent, consider installing louvered vent covers that are available at most hardware stores. These allow for air flow while restricting access to outdoor critters.
Dryer Duct Work:
Loosen the clamp that holds the duct-work to the dryer and remove the duct-work. If the duct-work is fully accessible, take it outside. With a regular lint brush, remove all the lint and debris from inside the duct-work.
Duct-work that is installed inside of walls will need to be cleaned with the help of an electrician's fish tape and dryer vent brush. Both of these items are available at most well-stocked hardware stores. Some stores will also rent out the electricians fish tape on a daily basis.
From the lowest opening of the duct-work, feed the fish tape through the duct-work and out of the other end. At the other end, attach the fish tape to the lint brush. Go back to the low point and slowly pull the fish tape back out. If the lint brush becomes jammed in a turn in the duct-work, simply push up and down on the tape until the brush moves past the corner. By doing it this way, the lint and debris is pulled out rather than having to try to push through it. Remove the lint that falls out to keep the opening clear as you work the tape through.
Dryer:
Clean the exhaust opening of the dryer where the duct-work attaches. Inspect the exhaust and make sure it is attached securely to the dryer. Remove the lint screen from the dryer and clean inside the lint trap with the brush.
Keep exhaust duct as straight and short as possible. Exhaust systems longer than the manufacturer's recommendations can extend drying times, affect appliance operation and may encourage lint build-up on pipe lining.
When running the clothes dryer, be careful not to over dry. Running your dryer too long not only wastes energy but can also damage your clothes. We recommend using an automatic setting, such as "less dry" rather than a timed setting.
Clean lint filters regularly. Cleaning the lint filters on your washer and dryer will save energy, improve performance, and minimize fire hazards.
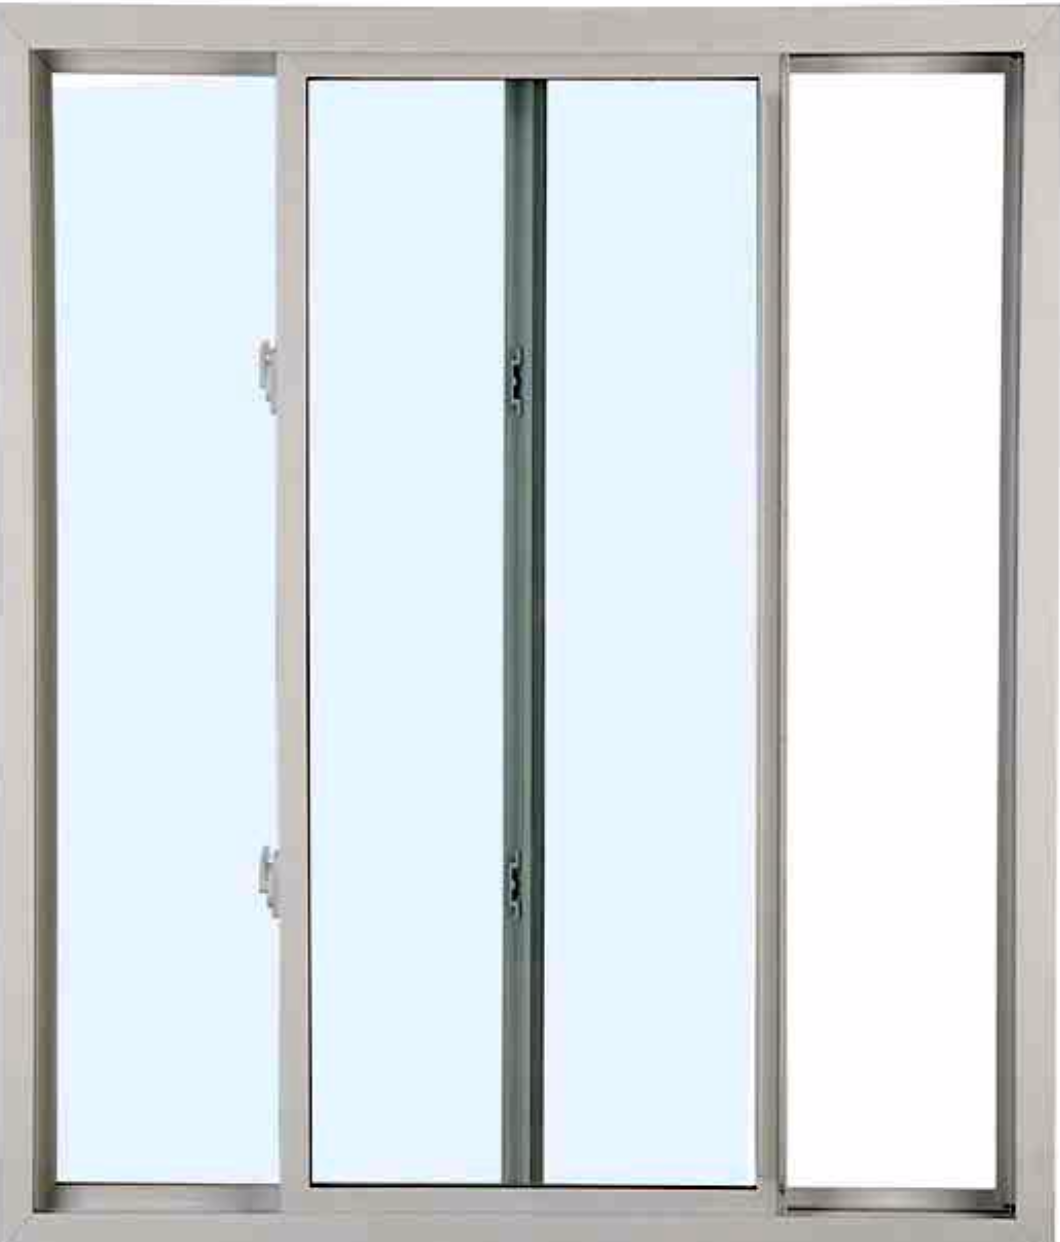 Window and Door Maintenance:
Annual maintenance will help keep your windows and doors operating smoothly. Use this checklist as an annual maintenance reminder.
•Weather-strip is a resilient material designed to act as a barrier in the space between the sash and frame to reduce air and water infiltration. Make sure it is still effective. If not, contact your local Marvin retailer.
•Examine the window's interior and exterior finish. Occasional repair to a damaged finish may be necessary. (See Maintaining Wood and Painting and Staining for more details.) Also, remember to be careful when using paints, stains and varnishes to make repairs. Never allow these solvent-containing materials to come into contact with weather-strip. Solvents cause weather-strips to lose its flexible qualities.
•Inspect the exterior caulking around the outer edges of the window frame. Trim off any old, loose caulking and seal any gaps with a good quality caulk.
•Check that all hardware (locks, opening mechanisms, etc.) operates smoothly.
•Make sure any exposed hardware screws are tightened securely.
•Clean any sand, dirt or dust from door and window hinges, sills and tracks.
•Check any energy panels and storm and screen combinations to make sure screws in turn buttons are securely fastened.
•Check doors for smooth operation. Wood doors require a stabilization period after installation, sometimes taking up to a year to adjust to humidity levels and other environmental factors.
When performing maintenance, always consider your safety first:
•Use caution on ladders, and always wear protective eyewear and clothing.
•When working with primers, paints, stains, cleaning solutions, etc., follow all recommended safety precautions and dispose of these materials according to manufacturer's instructions.
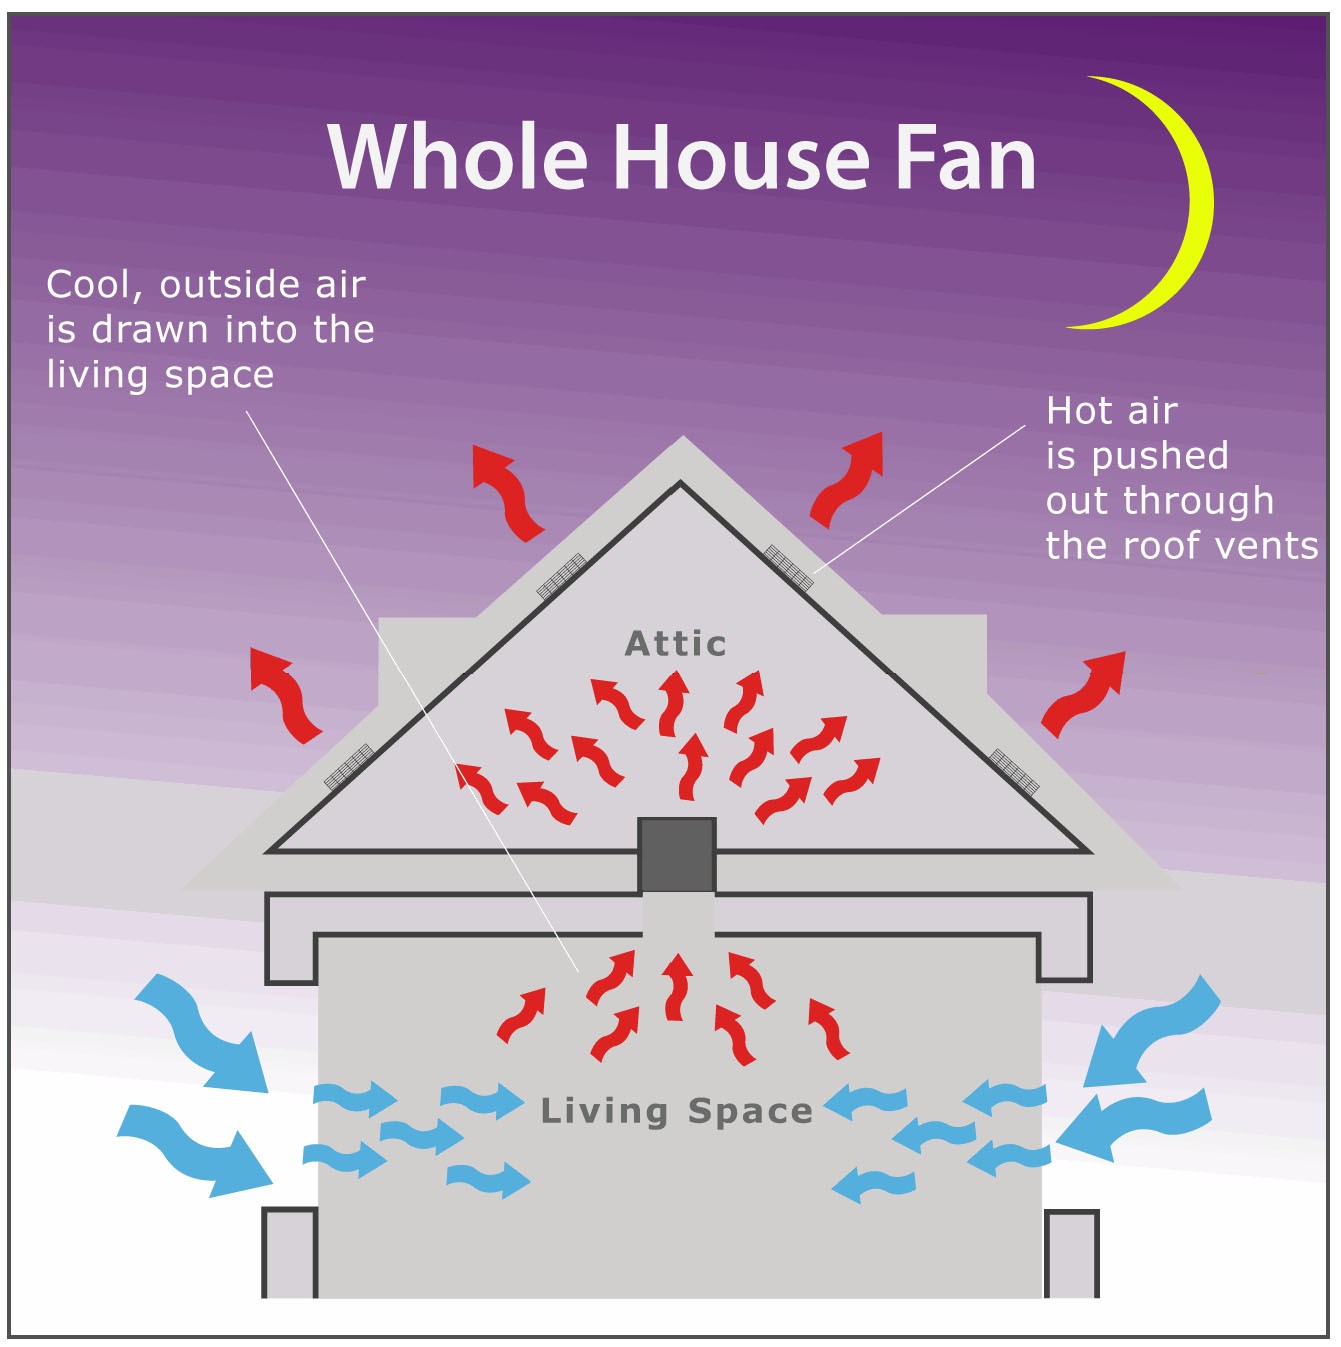 Thermostatically Controlled Attic Fan Info: ALWAYS use the services of a licensed and insured Home Improvement Contractor. Please Contact the Management Office for the procedure to eliminate voiding out your roof warranty with the HOA.
 Frequently Asked Questions Check out common questions and answers about attic fans:
1) What size fan do I need?
ANSWER: An attic fan should be sized to provide 10 attic air volume changes per hour.
To figure out what flow rate this works out to, figure out the volume of your attic in cubic feet. Multiply your attic volume x 10 air changes per hour to get the total flow required per hour.
Since fans are sized in terms of their cfm (cubic feet/minute) output, divide your total flow per hour by 60 to get cubic feet per minute.
Required flow rate in cfm = (attic volume x 10) / 60. Now check the fan specifications to find the fan or combination of fans required to meet your ventilation needs. It is also very important to make sure there is enough air inlet area in your attic to allow fresh air to enter and replace the hot air being exhausted. A minimum of 1 square foot for every 360 cfm of exhaust is required. Typically soffit vents are used as inlets.
2) How long will an attic fan last?
ANSWER: Attic fans are designed to provide many years of trouble free operation. attic fans are designed to provide many years of trouble free operation. Check the with the manufacturers' warranty.
3) How is an attic fan controlled?
ANSWER: A thermal switch is often used to control an attic fan. This switch only allows the fan to run when the attic is warmer than 80-90 degrees F. Running the fan only when the attic is hot extends the life of the fan motor and results in less heat loss to the attic in winter, but does not allow the fan to reduce moisture build-up in the attic at all times and does not allow the fan to prevent ice dams during the winter.
4) Where can I find more information and pricing on attic fans?
ANSWER: Perform a search on Attic Fans.
5) Can my attic have too much Ventilation?
ANSWER: The amount of ventilation an attic needs is determined by many factors, but in general the more the ventilation your attic has, the better off you will be. As attic air turnover is increased and fresh make-up air is brought into the attic, the attic temperature will begin to approach that of the ambient outside air temperature, which in turn minimizes heat transfer into your home. As long as your attic has plenty of fresh air make-up ventilation, more airflow through the attic will only increase the cooling performance of your attic fan.
7) Why would I want to cool off my attic?
ANSWER: During the summer, as the sun radiates heat onto your roof, your roof's shingles or tile becomes very hot. This heat is transferred through the roof and in turn heats up the air inside your attic. If the hot air stays inside your attic, the heat from this air will eventually enter your home.
While attic insulation slows this process, it does not eliminate the heat transfer process entirely. If your attic is not very well insulated, it will do very little to stop the heat from getting through. Additionally, a hot attic stays hot long after the sun goes down, so the process of heat transfer into your home never really ends.
By removing the hot air from your attic, the process of heat transfer into your home is minimized. The less attic heat that is transfer into your home, the less your air conditioner will need to work. If your air conditioner unit doesn't need to run as much to keep your home cool, you save energy and money.
8) What are the cost benefits of installing a attic fan?
ANSWER: How much money you will save is greatly dependent on the price of electricity in your area, the amount of attic space in your home, the efficiency of your attic insulation, and the amount of ventilation your attic vent is able to provide. In our experience, a typical installation will usually pay for itself in savings within 1-2 summers of use.
9) How are ridge vents, turbine vents, or gable vents different from a attic vent?
ANSWER: Ridge vents, gables vents, and dormer vents work by passive (natural) draft air convection. This means that as hot air rises in your attic, it should flow out from these vents creating a natural draft through the attic. However, as you have probably noticed if you currently have any of these vents installed on your home, they are not very effective at reducing the temperature of your attic.
Turbine vents are designed to pull hot air out of your attic when the wind blows. These vents are equally ineffective at removing attic heat due to frequent mechanical problems, low air moving capability, and a dependence on the wind to supply the power needed to induce a draft through the attic.
10) Are these attic fans very loud when operating?
ANSWER: No, not at all. You can barely hear them running when you're standing right next to one. The fan blades used in these attic vents are specially designed for whisper quiet operation.
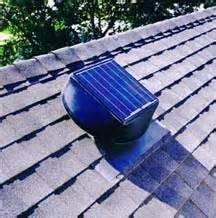 Solar Attic Fan Info Center: ALWAYS use the services of a licensed and insured Home Improvement Contractor. Please Contact the Management Office for the procedure to eliminate voiding out your roof warranty with the HOA.
 Commonly Asked Questions:
1) Does a solar attic fan qualify for a federal tax credit?
ANSWER: YES! Both the Purchase Price AND Installation Cost of a solar attic fan qualify for a 30% federal tax credit. The credit applies to equipment placed in service between January 1, 2009 and December 31, 2016. IRS Form # 5695 is needed to apply for this credit. Enter the installed cost on the form. Always check with your Accountant or Certified, Licensed Tax Preparer for up to date Federal & State rules that apply or for any changes.
2) Does a solar attic fan qualify for a state tax credit?
ANSWER: State tax incentives vary from state to state. Please check http://www.dsireusa.org/ to see if your state offers an incentive. Always check with your Accountant or Certified, Licensed Tax Preparer for up to date Federal & State rules that apply or for any changes.
3) What size fan do I need?
ANSWER: A solar attic fan should be sized to provide 10 attic air volume changes per hour. To figure out what flow rate this works out to, figure out the volume of your attic in cubic feet. Multiply your attic volume x 10 air changes per hour to get the total flow required per hour. Since fans are sized in terms of their cfm (cubic feet/minute) output, divide your total flow per hour by 60 to get cubic feet per minute. Required flow rate in cfm = (attic volume x 10) / 60. Now check the fan specifications to find the fan or combination of fans required to meet your ventilation needs. It is also very important to make sure there is enough air inlet area in your attic to allow fresh air to enter and replace the hot air being exhausted. A minimum of 1 square foot for every 360 cfm of exhaust is required. Typically soffit vents are used as inlets.
4) How long will a solar attic fan last?
ANSWER: Solar attic fans are designed to provide many years of trouble free operation. Check the with the manufacturers' warranty.
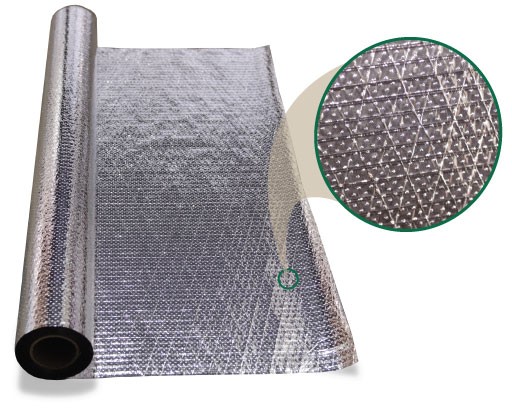 Radiant Barriers, What they are and how they Work. What is a Radiant Barrier?
When the sun heats a surface, it is primarily the sun’s radiant energy that makes the surface hot. Traditional insulation materials, like fiberglass batt's and cellulose actually absorb radiant heat energy Radiant barriers reflect it. A single layer of reflective material, properly installed between the hotter roof deck and the attic floor, may reduce radiant heat transfer to the attic by about 95%.
A good example of a radiant barrier is aluminum cooking foil since it reflects heat into or away from food while cooking. Since the 1930s (which is about when aluminum foil was invented) radiant barrier materials have proven themselves to be a potentially effective method of keeping unwanted heat out of buildings too. They are predominantly beneficial for buildings in cooling dominated climates. There are several types of radiant barriers offered. Some types include aluminum foil laminated to wood, heavy kraft building paper, mylar, polyethylene, and foil "batts" which are stapled or taped to the underside of the roof, and there are small chips or bubbles that are blown into the attic over the existing insulation. Does a radiant barrier have an R-value? Not Much! The R value is so small its hardly worth mentioning but remember that " R-value's" relate ONLY to a material's resistance to the flow, or transfer, of Conducted heat, they do nothing for Radiant energy, it takes a radiant or reflective barrier to deal with radiant heat which will drive in a straight line until it is either deflected, or absorbed. This means that the sun's radiant energy will eventually pass through your insulation, if it is not blocked by a radiant barrier.
The Department of Energy has a report, Effect of Radiant Barriers on Heating and Cooling Bills which states:
"The tests to date have shown that in attics with R-19 insulation, radiant barriers can reduce summer ceiling heat gains by about 16 to 42 percent compared to an attic with the same insulation level and no radiant barrier." Now imagine the energy you would save with reduced heat gains like that!
Your Options: You can purchase one of the aluminum foil batt type materials, which do not provide a significant amount of thermal insulation, and staple it to the underside of the roof or, apply Hy-Tech's Exclusive Radiant Barrier Coat, An Aluminum Pigment, Ceramic fortified, Attic Radiant Barrier paint. Non-Toxic, Very Low odor, seamless installation, no voids or gaps, no thermal bridging through the trusses and at a cost per square foot that is much lower than the batt type materials.
CERAMIC-ALUMINUM BARRIER COATING. As a Radiant Barrier: Stops heat from entering or escaping.
Until now the only types of radiant barriers available were foil film, metalized plastic film, and metalized "chips”. These types of barriers are installed by attaching to the underside of the roof with staples or sprinkled about on top of the fiberglass insulation on the attic floor. There are a few spray-able paint coatings available that are sold as radiant barriers but they all contain volatile solvents which are not only hazardous to the installer but also to the homeowner as the toxic fumes penetrate down through the ceilings and into the interior. Don't be fooled by the terms "latex base “or "water cleanup" as they do not reflect the true chemical makeup of the coating. Read the ingredients!
How It Works:
Aluminum is highly reflective to infrared (IR) due to the high concentration of mobile electrons. Barrier Coat contains aluminum metal in the form of thin "Leafing" aluminum flakes which are highly reflective and reduce the penetration of IR radiation. The overlapping aluminum flakes align themselves parallel to and concentrated near the surface of the coating and have reflectance values of 0.75 to 0.8 for the key spectral range of 1 to 8 .mu.m. In addition to the infrared reflective aluminum pigment, Barrier Coat also contains a very high concentration of heat reducing Hy-Tech Insulating ceramics. The combination of these two heat reduction pigments forms Hy-Tech's exclusive "Ceramic Vacuum Matrix" which minimizes solar-induced heat build-up
As a Sound Barrier: The HY-TECH hollow ceramic microspheres are a vacuum inside. Physics law states that nothing can move by conduction through a vacuum, since it represents an absence of matter. In effect we have a miniature thermos bottle... a microscopic hollow vacuum sphere that resists thermal conductivity and reduces the transfer of sound fairly well. Although Barrier Coat reduces the transfer of sound it is not intended to be a solution for serious sound problems.
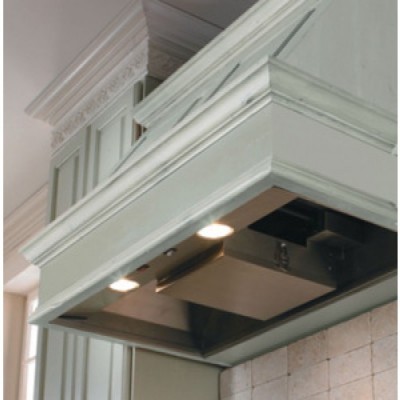 Range Vent Hood Maintenance Tips, Filter cleaning/replacing
You need to periodically clean your over-the-stove vent hood. The thin, silvery screen is the grease filter (there may be more than one). It traps airborne oils and grease to keep them out of the blower and exhaust vent. To clean the filter, remove it and soak it in a degreasing solution until the grease is dissolved.
Next, wash it with warm, soapy water to remove any traces of the degreaser. Then put it in the upper rack of the dishwasher and run it through a normal cycle. There is a product called "Awesome" which is one of the best products for cutting through grease, dirt and grime.
Note… If your unit circulates the air rather than vents it, it may have one or more activated charcoal filters. Don't wash these. Just replace them when they lose their effectiveness.
Interior cleaning: Warning! Be sure the unit is turned off before you clean it. Also avoid spraying cleaner directly onto the light bulb or light bulb socket.
Clean the interior of the vent hood with a standard household degreaser/cleaner.
Exterior cleaning:
Clean the exterior of your vent hood with a degreaser/cleaner or a non-abrasive cleanser.
Fan motor care:
Most vent hood fan motors don't need any maintenance. Over time, the motor and bearings may become stiff because of the constant heat, humidity, and grease to which they're subjected.
Also over time, the blower wheel gets greasy and dirty, which can slow down the fan or cause vibration. Remove the wheel and clean it with a degreaser. Then, if the fan is still slow or if it vibrates, you need to replace the fan motor.
Vent cleaning:
If your fan vents (rather than just circulates), you need to regularly check the vent that leads from the vent hood to the outside, to make sure that grease isn't building-up on the inside of it. If it is, contact a vent-cleaning contractor to clean the vent properly. (You may find such a contractor under "chimney sweeps," or "HVAC duct cleaning," or "ventilation cleaning" in your telephone book Yellow Pages or perform an online search).
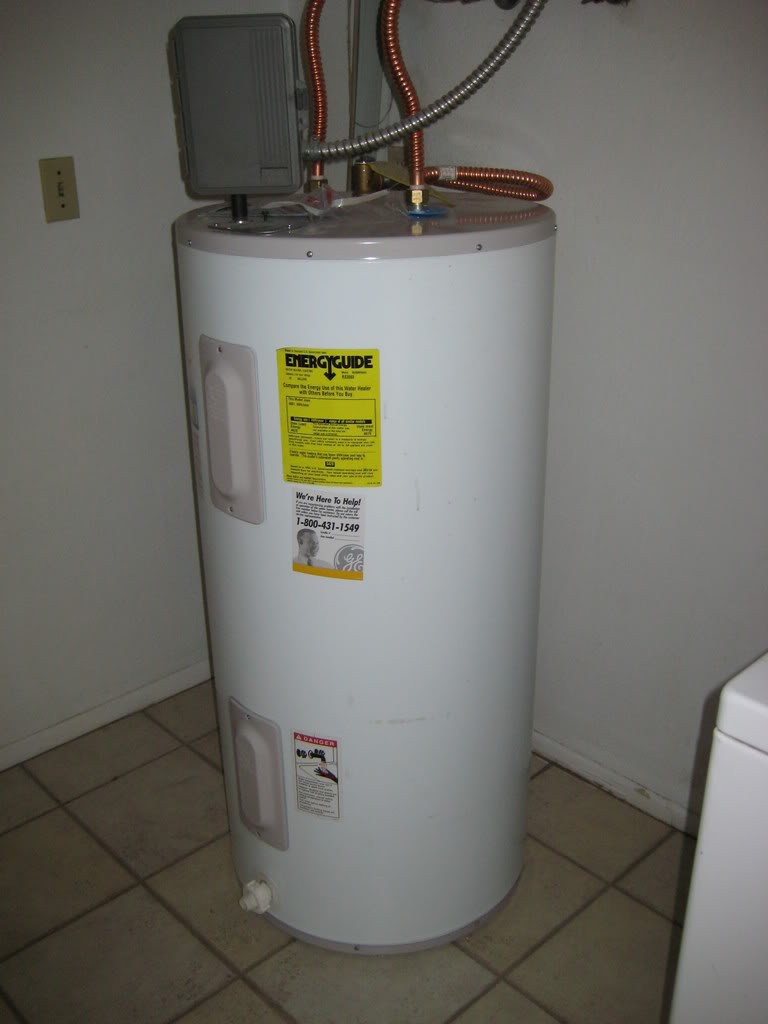 Water Heater Maintenance
 Very few people know that in order to keep your water heaters running properly and efficiently very simple maintenance procedures need to be performed. (These come with the instructions and are often overlooked.)
As water is pumped into your water heater tank dirt, sediment and various minerals settle on the bottom. Depending on your water quality these extra "ingredients" can add up rather quickly robbing your water heater's efficiency and costing you in the long run. If left unchecked they can not only make your water heater work harder but also allow your tank to rust and slowly be eaten away until you need to replace the entire unit which is very costly yet easily preventable. And cheap to prevent! You just need a hose, bucket (optional) and gloves (optional too, but safer with.)
This Instructable will show you how to perform a simple yearly draining of your water heater to keep it running smoothly.
Step 1: Locate Water Heater. Be careful! You are going to be dealing with gas/electricity and very hot water and steam.
Step 2: Determine if it's Gas or Electric
This should be simple enough. Look around the tank itself and read any warnings and labels. If you can't determine one sure fire indication is if there is a pilot light odds are it's gas. Note: Read the instruction on the tank for turning off the gas and or electricity. Don't just do it unless you know what you are doing.
Step 3: Locate Water Shut Off Valve, Pressure Release Valve, & Water Drain
The water shut off valve is located on the top of the water heater. It typically looks like the circular water valves used for front and back yards.
The pressure release valve is located on the top as well. It should have labeling near it. There is piping that leads out of the water heater and into the wall. On the other side of the wall should the continuation of this piping. It is typically in the front yard or entry way. Make sure it is not obstructed. This is very important.
The water drain is located on the bottom. It is usually a simple spout that has threads so that a hose can be attached. (These threads will be needed for later.)
Step 4: Turn Off Heating Source and Gather Supplies
Now that you know where your water heater is and what it operates with (gas or electric) you are ready to perform it's yearly maintenance. Be sure to turn off the gas to the water heater (if gas) or shut off the circuit breaker if electric. (Again, read instructions carefully.) I did this the night before. This saves the energy it takes to warm the water that you will soon be draining. No need to heat water you won't be using.
Get a hose.
Get a bucket.
Get some gloves to protect you from possible hot steam and or water.
Step 5: Turn Off Water & Attach Hose
Like the title says, turn off the water to the water heater and attach the hose to the water drain.
Step 6: Turn On Water Drain & then Open Pressure Release Valve
Next you will want to turn on the water drain to release the water from the water heater tank.
The water will drain from the hose and then slowly stop. This is because the pressure release valve needs to be opened to allow air into the tank. A vacuum has been formed and no additional water will be drained from the tank until the vacuum is opened up and removed.
Don't worry if the water is a little dirty as first. That is from all the dirt and sediment that has built up. This is the reason why you are draining it. Get all that stuff out! Wait 10 - 30 minutes to allow all the water to drain.
Step 7: Turn On the Water to flush the rest of the sediment out.
Turn off the water drain and remove the hose.
Take the bucket and place below the water drain.
With pressure valve still open turn on the water to the water tank and then turn on the water drain to allow the rest of the sediment to be flushed out. Allow a few gallons worth of water to drain. Be sure to check the water draining out and make sure it is clear. If it is then you are set to refill the tank.
Step 8: Refilling the Tank
Make sure the water drain at the base of the tank is turned off.
Close the pressure release valve.
Turn on the water to allow the tank to be filled.
Once the tank is full you can turn the gas or circuit breaker back on. Caution: Do not turn the heating unit on until the tank is full. If the tank is not full it can cause heating damage to the unit.
Sit back, relax, and enjoy your nice hot water that will be flowing and heating you more efficiently. You got a full year to wait and perform this maintenance again.
Note 1: If you want you can drain a few gallons a month from your tank especially if you live an area with a lot of sediment in your water. You don't need the hose. Just use the bucket for this month to month maintenance.
Note 2: If you experience any leaks in the water valves or pressure valves be sure that they are tightened correctly. There is a packing nut just below the knob that can be tightened if needed. If the leaking persists then there is a good chance they haven't been used enough and need to be replaced. So be sure to perform this routine maintenance to keep the valve working properly as well.
Insulate Your Water Heater Tank for Energy Savings. Unless your water heater's storage tank already has a high R-value of insulation (at least R-24), adding insulation to it can reduce standby heat losses by 25%–45%. This will save you around 4%–9% in water heating costs.If you don't know your water heater tank's R-value, touch it. A tank that's warm to the touch needs additional insulation. Insulating your storage water heater tank is fairly simple and inexpensive, and it will pay for itself in about a year. You can find pre-cut jackets or blankets available from around $10–$20. Choose one with an insulating value of at least R-8. Some utilities sell them at low prices, offer rebates, and even install them at a low or no cost.
Insulating an Electric Water Heater Tank
You can probably install an insulating pre-cut jacket or blanket on your electric water heater tank yourself. Read and follow the directions carefully. Leave the thermostat access panel(s) uncovered. Don't set the thermostat above 130ºF on electric water heater with an insulating jacket or blanket—the wiring may overheat.
You might consider placing a piece of rigid insulation—a bottom board— under the tank of your electric water heater. This will help prevent heat loss into the floor, saving another 4%–9% of water heating energy. It's best done when installing a new water heater.
Insulating a Gas Water Heater Tank
The installation of insulating blankets or jackets on gas and oil-fired water heater tanks is more difficult than those for electric water heater tanks. It's best to have a qualified plumbing and heating contractor add the insulation. If you want to install it yourself, read and follow the directions very carefully. Keep the jacket or blanket away from the drain at the bottom and the flue at the top. Make sure the airflow to the burner isn't obstructed. Leave the thermostat uncovered, and don't insulate the top of a gas water heater tank—the insulation is combustible and can interfere with the draft diverter.
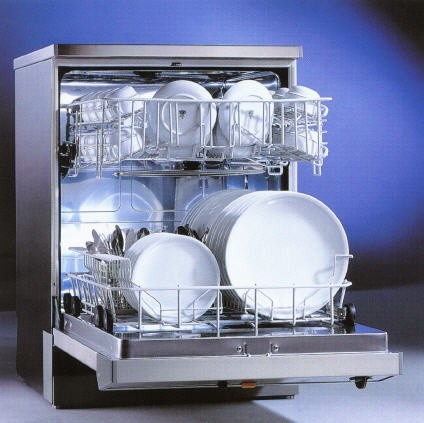 Dishwasher Maintenance Tips
Interior cleaning & deodorizing:
You don't need to clean the interior of your dishwasher if you use it regularly. If it goes un-used for a week or more and begins to mold or smell bad, you can clean it using Glisten Dishwasher Cleaner and Deodorizer, or any proven effective cleaner or deodorizer available.
Exterior cleaning:
Just clean the exterior of your dishwasher with a damp sponge and a little dish detergent.
Rust removal:
Try RoVer Rust Remover or any high rated rust remover to remove rust stains from the inside of your dishwasher. You can find this product in our parts section.
Dish rack repairs:
If the plastic coating wears off of the tines of the dish racks in your dishwasher, they may corrode and rust. We have repair kits available for those tines in Light Blue, Gray, and White. These repair kits can be found in our parts section.
Filter cleaning:
On many dishwashers, there's a filter near the bottom, or under the lower spray arm that needs to be cleaned regularly. If you have this sort of filter, check your owner's manual to find out how to remove and clean it. If it has holes in it, replace it to protect the pump and motor seals from particles that may be in the dishwasher.
Spray arm cleaning:
Over time, the small holes in the spray arm(s) of your dishwasher may become clogged with bits of paper, toothpicks, glass, etc. Your dishwasher will do a better job of cleaning your dishes if you take a moment to clean out these small holes, from time to time.
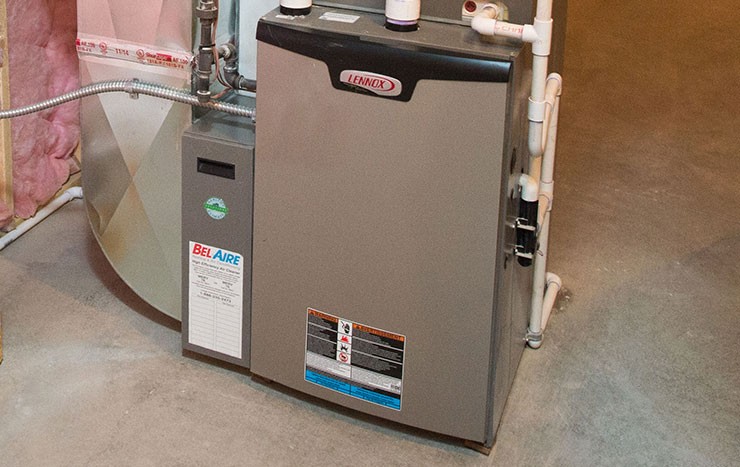 Maintenance for Dual Combustible HAVC Systems/Heating Central Air
You wouldn’t drive your car 100,000 miles without changing the oil. The same logic holds true for your home comfort system. Regular preventative maintenance is the best way to ensure trouble-free operation and peak performance. Pre-season maintenance is also important. It can help to avoid a system failure in severe hot or cold weather when you need it most, and it can also keep your energy bill from getting out of control.
When Should I Do Maintenance?
The old adage is true: an ounce of prevention is worth a pound of cure. Below you’ll find our Preventative Maintenance Checklist, which is our proven method to keep your system in the pink and your home in constant comfort.
For a system that heats and cools: perform maintenance in the spring and fall.
For cooling only: perform maintenance at least once a year, before the cooling season.
For heating only: perform maintenance at least once a year, before the heating season.
Preventative Maintenance Checklist:
Many dealers provide priority service for their customers who have an annual maintenance or service agreement. Bi-annual preventative maintenance will ensure that your system runs as efficiently as possible. Your local dealer will perform the following tasks, depending on the unit:
Outdoor Units:
Inspect unit for proper refrigerant level and adjust if necessary
Clean dirt, leaves and debris from inside cabinet
Inspect base pan for restricted drain openings—remove obstructions as necessary
Inspect coil and cabinet—clean as needed
Inspect fan motor and fan blades for wear and damage—on older models lubricate as needed
Inspect control box, associated controls/accessories, wiring and connections. Controls may include contactors, relays, circuit boards, capacitors, sump heat and other accessories. All control box and electrical parts should be checked for wear or damage.
Inspect compressor and associated tubing for damage
Indoor Units:
Inspect and clean blower assembly (includes blower housing, blower wheel and motor)
On older models, lubricate motor and inspect and replace fan belt if needed
Check combustion blower housing for lint and debris and clean as necessary
Inspect evaporator coil, drain pan and condensate drain lines. Clean as needed
Inspect for gas leaks in gas furnaces
Inspect burner assembly—clean and adjust as needed
Inspect ignition system and safety controls—clean and adjust as needed
Inspect heat exchanger or heating elements
Inspect flue system—check for proper attachment to the furnace, any dislocated sections, and for signs of corrosion. Replace if necessary.
Inspect control box, associated controls, wiring and connections
Clean or replace air filters
Inspect conditioned airflow system (duct-work)—check for leaks
While Your System Is Operating:
Monitor system starting characteristics and capabilities
Listen for abnormal noise
Search for source of unusual odors
Monitor air conditioning and heat pump systems for correct refrigerant charge
Measure outdoor dry bulb temperature
Measure indoor dry and wet bulb temperature
Measure high and low side system pressures
Monitor gas furnace for correct line and manifold gas pressure—make adjustments as needed
Measure temperature rise and adjust airflow as needed
Check vent system for proper operation
Monitor system for correct line and load volts/amps
Monitor system operation per manufacturer's specifications
Provide system operation report and recommend repairs or replacement as necessary
NOTE: Trane recommends all maintenance and service work be performed by a professional air conditioning and heating dealer that holds the appropriate credentials to install and service air conditioning and heating equipment.
Cooling:
Set the thermostat as high as comfort will permit.
Make sure attics are adequately ventilated to relieve heat buildup. If necessary, improve airflow by adding or enlarging vents.
When building a new house or renovating an old one, choose light-colored roof shingles to reflect more of the sun's heat.
During moderate weather, don't use the air conditioner unnecessarily.
Draw blinds or drapes to block the sunlight during the hottest part of the day.
Install awnings over windows exposed to direct sunlight.
In the cooling season, don't run kitchen and bath exhaust fans longer than necessary.
Don't place lamps, TV sets or other heat-producing devices beneath a wall-mounted thermostat. Rising heat from that equipment may cause the air conditioning system to overcool your house.
Heating:
Locate the thermostat on an inside wall away from windows and doors.
Set the thermostat as low as comfort permits. Each degree over 68°F can add 3% to the amount of energy needed for heating.
People generate heat. So lower the thermostat a degree or two when expecting a large group of guests.
Insulation:
Make sure your home is properly insulated. This is the single most important step in conserving energy. Thermal insulation should be specified in terms of thermal resistance (R-values). R-30 (10") is recommended for ceilings, and R-11 (3-1/2”) for exterior walls and floors over unheated areas. In colder climates, consider additional insulation.
Infiltration of humid outside air is your heating and air conditioning system's worst enemy—it could account for 15% to 30% of air conditioning energy requirements. Find the places where air can sneak into the home and plug them with caulking, weather-stripping or plastic. Also, weather-strip and caulk around all entrance doors and windows.
Cut heat transfer through your windows by 40% to 50% with double-glazing (two panes of glass separated by a sealed air space) and low-e glass.
Use wood- or metal-frame storm windows even if single-glazed windows are high quality. The extra layer of glass and the layer of still air will cut heat transfer considerably.
Install storm doors at all entrances to your house.
Keep all windows and doors closed.
Remember that by increasing the glass area, you increase the amount of heat added in summer and lost in winter.
Make sure fireplaces have tight-fitting dampers, which can be closed when the fireplace is not in use. Invest in a humidifier to conserve energy in winter. The air in your home won't be as dry, so you stay comfortable at a lower temperature setting.
 Dehumidifiers
 If your home is stuffy or musty, and water condenses on windows and pipes, it is showing signs of humidity levels that are too high.
Showering, running a washing machine or dishwasher, cooking—all of these activities put moisture into the air, which can be problematic, especially if you live in a climate where humidity levels are already uncomfortably high.
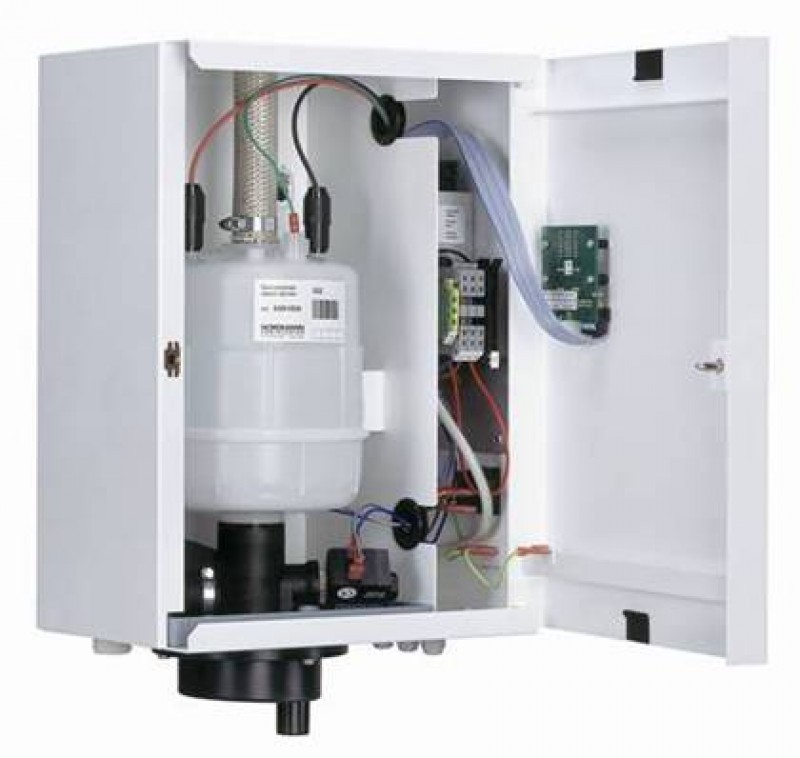
Dehumidifiers are a practical and easy solution for reducing high humidity levels. A dehumidifier is a relatively simple appliance that is designed to extract excess moisture from indoor air, making interior spaces far more comfortable and healthy for occupants.
Dehumidifiers: Whole House vs. Portable
Some dehumidifiers are designed to reduce the humidity in a single room, while others can handle the entire house.
Whole house dehumidifiers are the most expensive models, costing between $1,000 and $2,000. They typically are fixed units professionally installed and connected to existing ductwork in a home’s central air or heating system.
Portable dehumidifiers, which you simply plug in, are the most popular models, available at big box hardware stores and major home improvement centers. Advances in technology have made these dehumidifiers easy to use, affordable, and effective at improving your home’s air quality.
But not all portable dehumidifiers are the same. The bottom line is to pick a unit that is efficient and effective at reducing indoor humidity and keeping it at optimal levels.
Types of Dehumidifiers
There are three common types of home dehumidifiers: heat pump dehumidifiers, chemical absorbent dehumidifiers, and dehumidifying ventilators. Each has its advantages and disadvantages.
Heat pump dehumidifiers extract water from the air by using a heat pump that is similar to an air conditioner pump. First, a fan pulls the indoor air across a very cold coil, which causes the moisture to condense. The droplets drip into a bucket inside the unit. The dry air is warmed by a second, heated coil and exhausted at room temperature. These dehumidifiers are considered among the most effective.
Chemical absorbent dehumidifiers work best in warm climates. They use a chemical drying agent, or desiccant, on a heat exchange wheel to absorb water molecules from the air. Damp air is sent outside via vents. Desiccant dehumidifiers use a lot of energy. They are more commonly used by industries than homeowners.
Dehumidifying ventilators have a sensor controller and exhaust fan. The sensor controller activates the unit when humidity reaches a specified level. Dehumidifying ventilators are less effective in muggy climates because they draw outside air into the house. These dehumidifiers often are used in basements. But they can depressurize a room and cause gas spillage. Make sure gas furnaces are properly vented.
How a Dehumidifier Works
While a dehumidifier does not cool air, it makes it more comfortable by drawing moisture out of it.
If your home doesn’t have air conditioning, it may rely upon a dehumidifier to reduce uncomfortable, muggy humidity in room air. A dehumidifier uses refrigeration principles the way an air conditioner does, but it doesn’t cool the air—in fact, it warms it slightly.
A dehumidifier is a box that contains cold evaporator coils, warm condenser coils, a fan, and a reservoir or drain to catch water (see the illustration below). The fan blows moisture-laden room air over the cold coils, where water condenses and drips into the pan or drain. The drier air then blows across the warm coils and back into the room.
Although a dehumidifier does not cool the air, it makes it more comfortable because it decreases the humidity. But a dehumidifier does not function well under about 65 degrees F.
A dehumidifier’s fan must have electric power, the evaporator coils must contain a proper charge of refrigerant, and the controls must work for the dehumidifier to operate.
In the same way that a thermostat controls a heater or air conditioner, a dehumidifier is cycled off and on by a humidistat that measures a room’s humidity.
Humidifiers
Is the humidity inside your home too low? Dry air can be a real problem when it comes to your family’s comfort and health.
Low levels of water vapor in the air can dry out and irritate skin. The respiratory system, which relies on moisture to fight off viruses and bacteria, dries out, making you more susceptible to colds, coughs, and asthma.
Ideal levels of humidity in rooms should range from 30 percent to 50 percent in winter and 40 percent to 50 percent in summer. In dry-air climates, maintaining humidity at these levels demands mechanical assistance. That’s where humidifiers come in. These appliances are designed to add water vapor to the air on an as-needed basis.
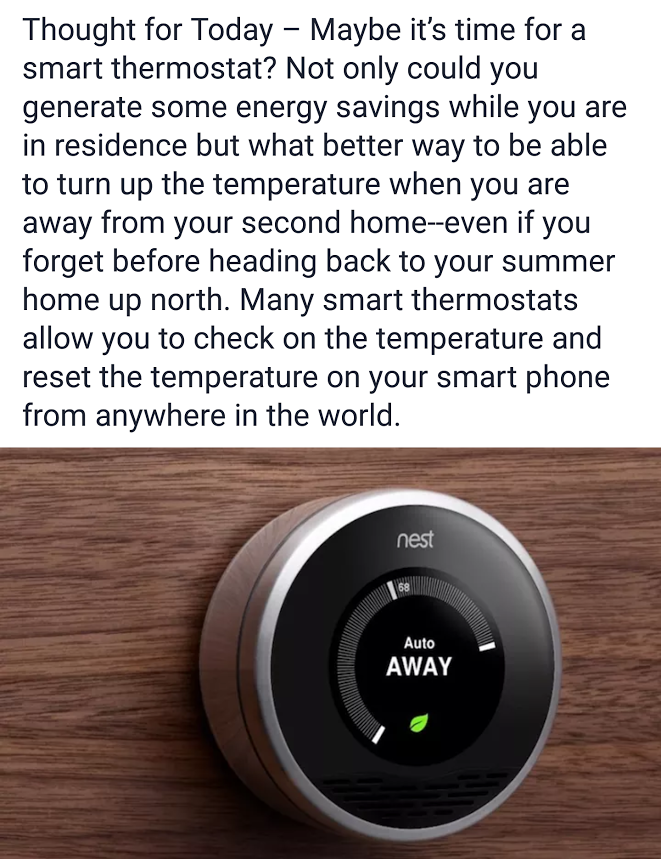 A WiFi thermostat can save you money by giving you remote control of your home’s heating and cooling system. WiFi thermostats are convenient, easy to use and can save homeowners time, energy and money. By monitoring and adjusting your home’s heat and air conditioning settings, you’ll soon reduce your heating and cooling costs.
What is a Wireless Thermostat?
A wireless thermostat—also called a WiFi thermostat, digital thermostat or Internet thermostat—is a home automation device that regulates temperature. The best WiFi thermostats contain sensors which control the heating and cooling systems within houses, apartments or businesses. A WiFi thermostat works in conjunction with your heating, ventilation and air conditioning (HVAC) system. While a standard thermostat acts as a control panel for your home’s heating and air conditioning system, a programmable thermostat can be adjusted from a remote location. Schedule temperatures that correspond with when you are sleeping, waking up, away from home and back in the house again. Simply select your own cooling and heating preferences based on your energy savings goals.
How does a Smart Thermostat Work?
A smart thermostat is connected to the Internet through an Internet protocol (IP) network. This IP connection then allows users to remotely send instructions to a smart thermostat directly from a computer, laptop, tablet, smartphone or web application. These instructions can range from turning on the IP thermostat, turning it off or changing its scheduled programming. The best WiFi thermostats allow users to interact with their home’s heating or cooling system from any remote location.
Smart thermostats are one type of home automation device that can be included in a home security system package. Home automation systems allow users to regulate domestic activities through sensors, electronic interfaces and controllers. Via remote thermostat access, homeowners can automate their appliances, home entertainment centers, lights or Internet thermostats.
How to use a Digital Thermostat
Digital thermostats should come equipped with an instruction manual and installation guide. Most home security and Internet providers will allow you to select between self-installation or professional installation. Once your wireless thermostat has been installed, you can next set up your login credentials and password. Then, customize your preferences using the wireless thermostat’s control panel, desktop portal or corresponding heat and cool icons. The best WiFi thermostat can save you energy, money and time. Use your wireless Internet thermostat to postpone heating or cooling of your house until you’re about to return home. You can utilize a WiFi thermostat iPhone app or smartphone application to monitor, adjust or shut off the heat or air in your home. Easily access and manage all of your thermostat WiFi settings on the home screen or touch screen controller. WiFi programmability gives you control of your home from virtually anywhere.
It’s recommended that you set up some initial preferences or rules for what temperature each room in your home should be at a specific time of day. Ensure that these rules do not contradict one another and keep in mind that you can always change your saved heating or cooling temperature settings based on the changing seasons or inclement weather. Any programming that you have previously configured from your computer, laptop, tablet, smartphone or mobile device will be directly applied to your WiFi-enabled thermostat device.
How a Wireless Thermostat Can Help You Save Money
Wireless thermostats can help homeowners and families save money each and every month. The average cost of savings of the best WiFi thermostat can range from $300 to $400 a year. Home electricity usage can cost hundreds of dollars each month in utility bills. Start saving money by using the best WiFi thermostats. These thermostats are efficient, eco-friendly and allow you to use less energy, all while helping the environment. If you’re away from home and have forgotten to turn off the heat, the best WiFi thermostats will regulate your temperature until you’ve returned.
The many benefits of a WiFi-enabled thermostat range from convenience and flexibility to energy savings and efficiency. You can set or adjust your home’s temperature from anywhere, anytime—plus, you will also save money! A wireless Internet thermostat will help you to efficiently manage energy costs, be comfortable, and take total control of your home’s heating and cooling systems. Remote thermostat access provides a higher level of convenience than what’s possible with a standard thermostat.